1. If you already have a Carrier API integration setup on your Nventree store, and you need to automate label printing by mapping the Carrier Service Codes with Delivery services, then you have to follow the next steps:
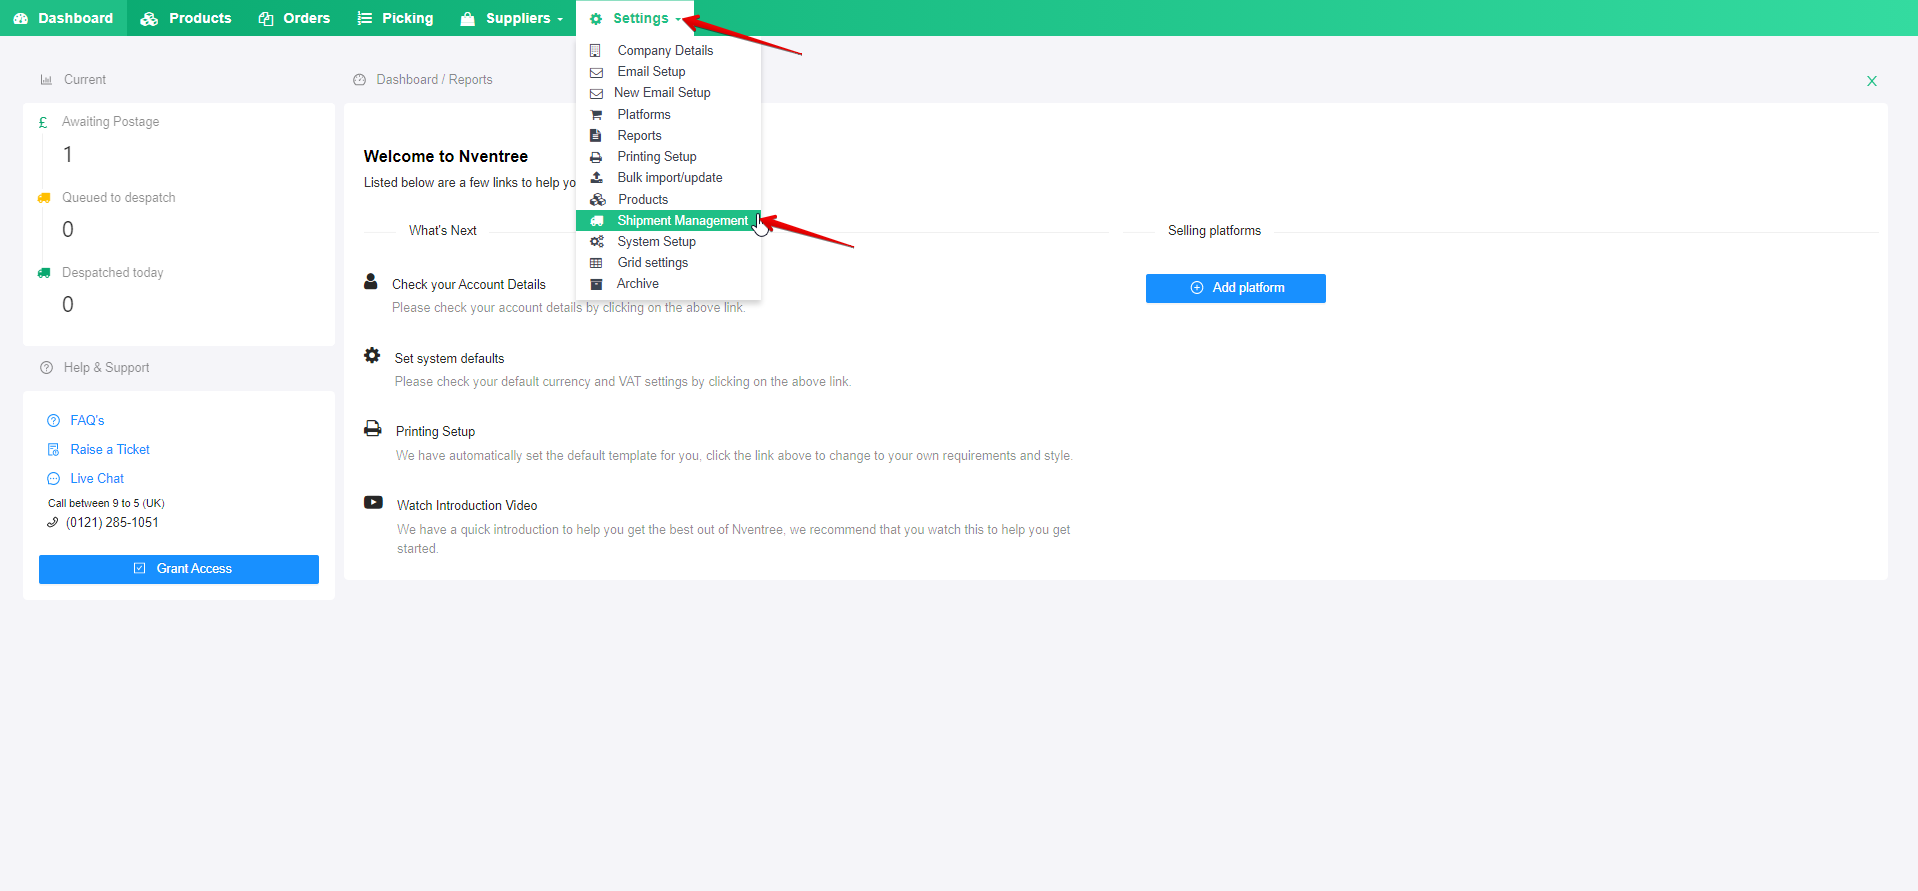
2. Navigate to your Carrier integrations from Settings > Shipment Management :
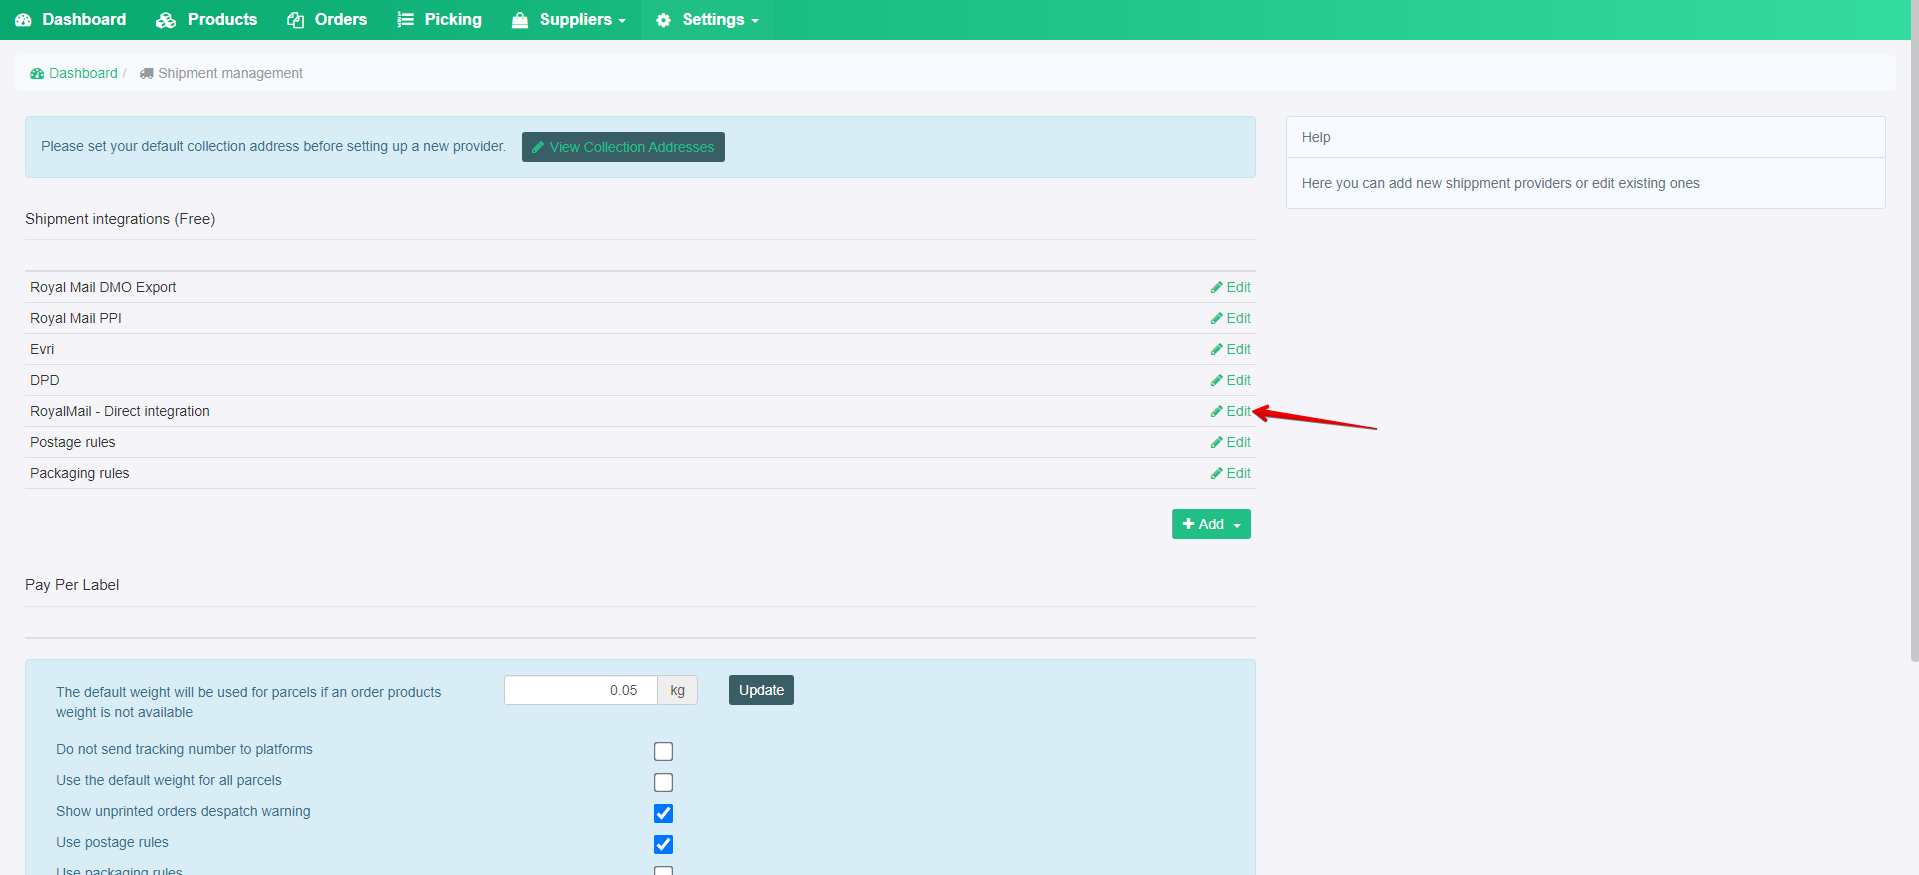
3. Select the Carrier integration where you want to add service code mappings and click Edit:

4. Once you see the Service Code list, enable the ones you want to have mapped, or enable codes to be used in the ‘Create Carrier Label (Ad-hoc)’ feature and map the Order Delivery Service to the Service Code that it should trigger, once mapped Save at the bottom of the page:
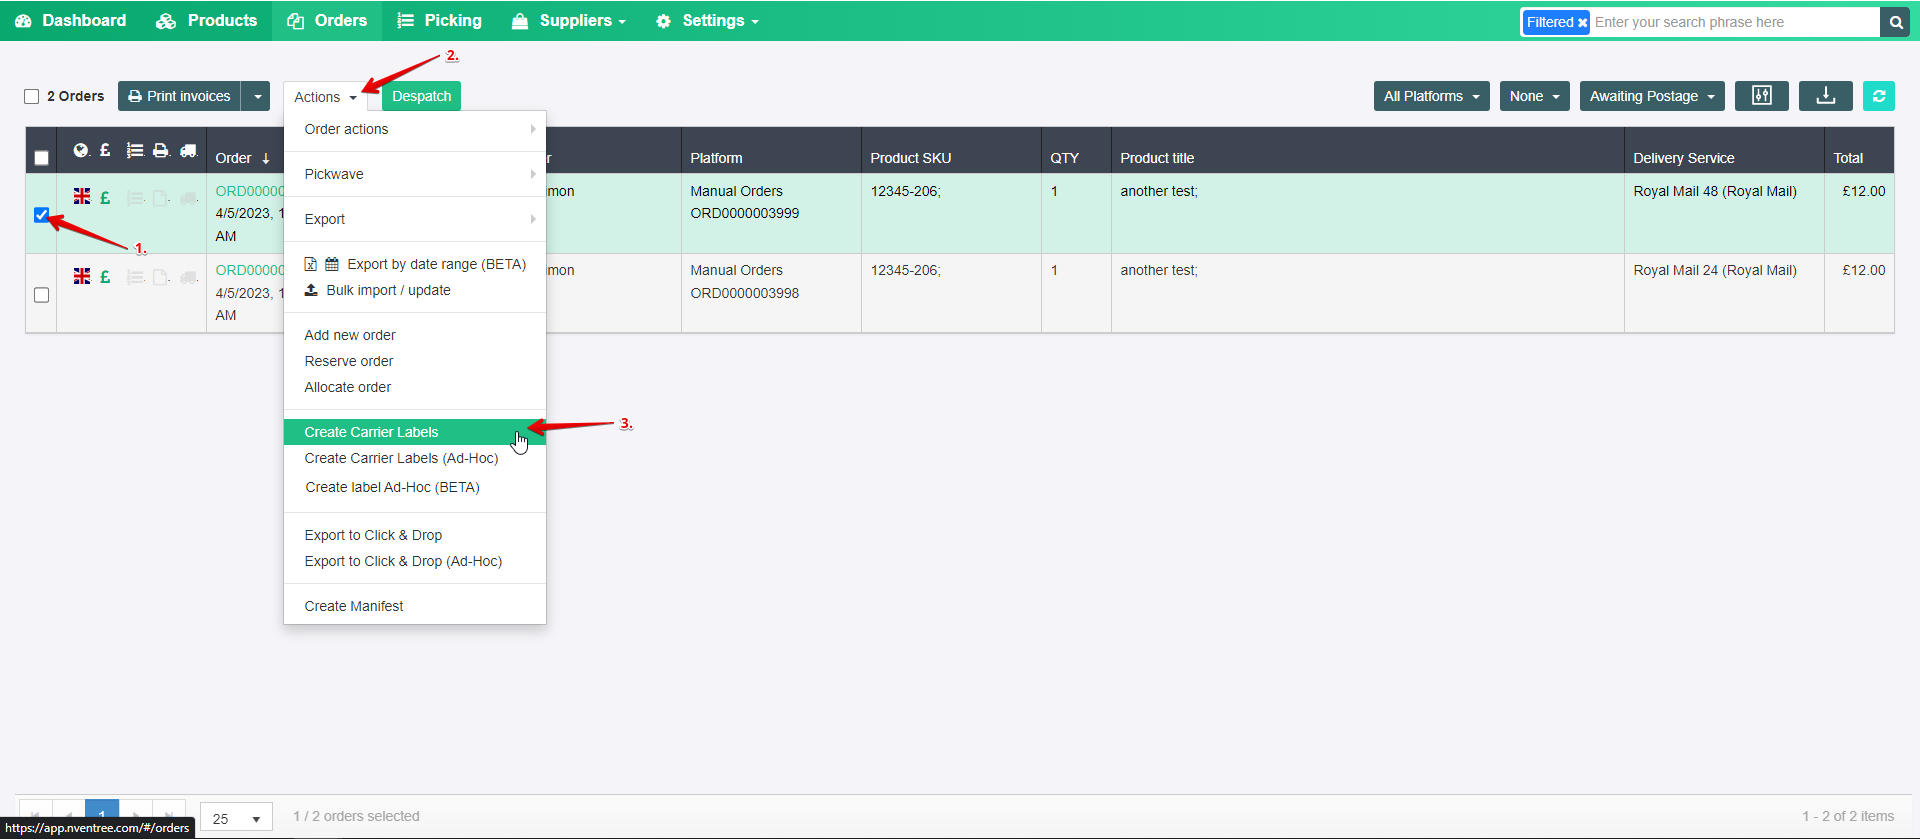
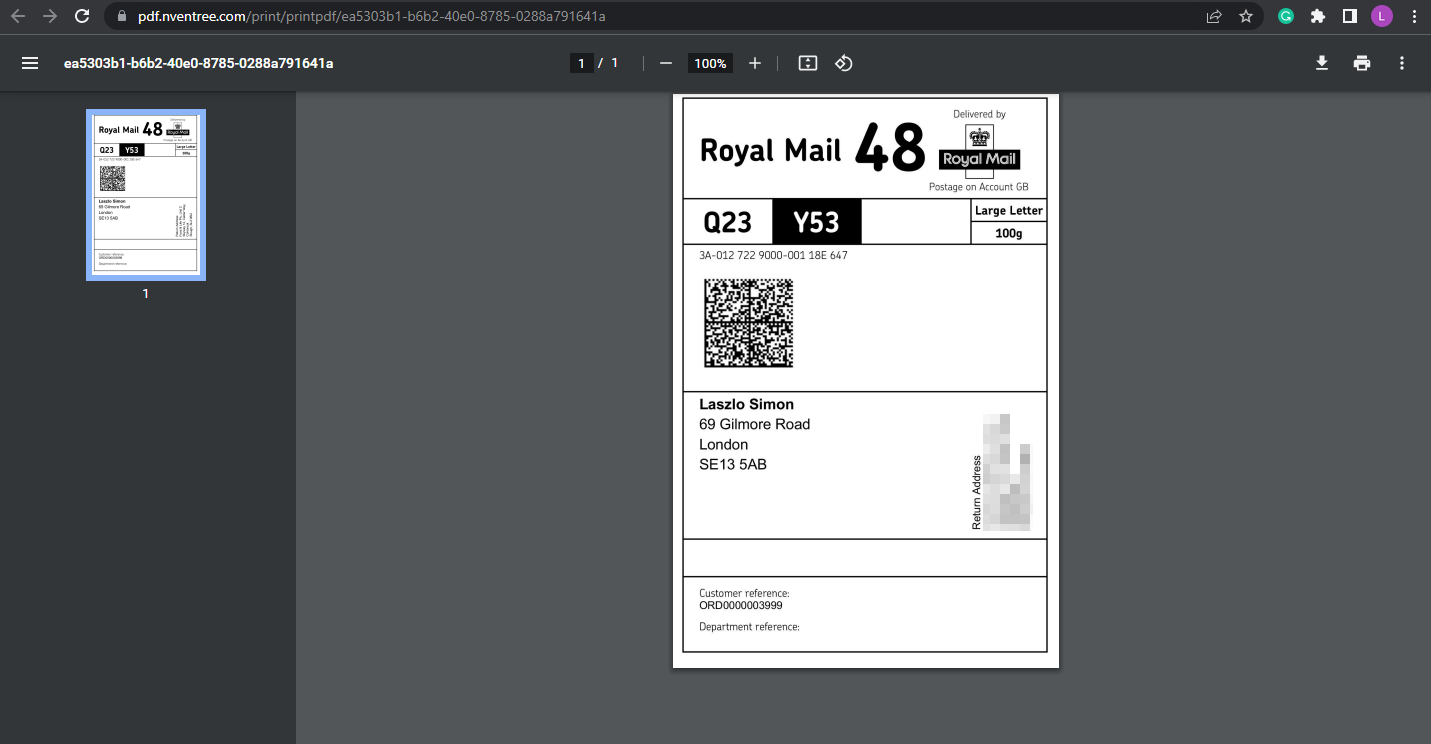
When the mappings are saved, and you have an order you can create a label for, all you’ll have to do is head over to the Orders page, select the order you want to produce a label for, then under Actions use the ‘Create Carrier Labels’ button, and a label PDF will be generated in a new browser window:
5. When the label has printed you can go back to the Orders page, and when you refresh the page, you will be able to see a Green Label icon on the order that signifies that a label has been produced, and you can see the time the label was created at as well:

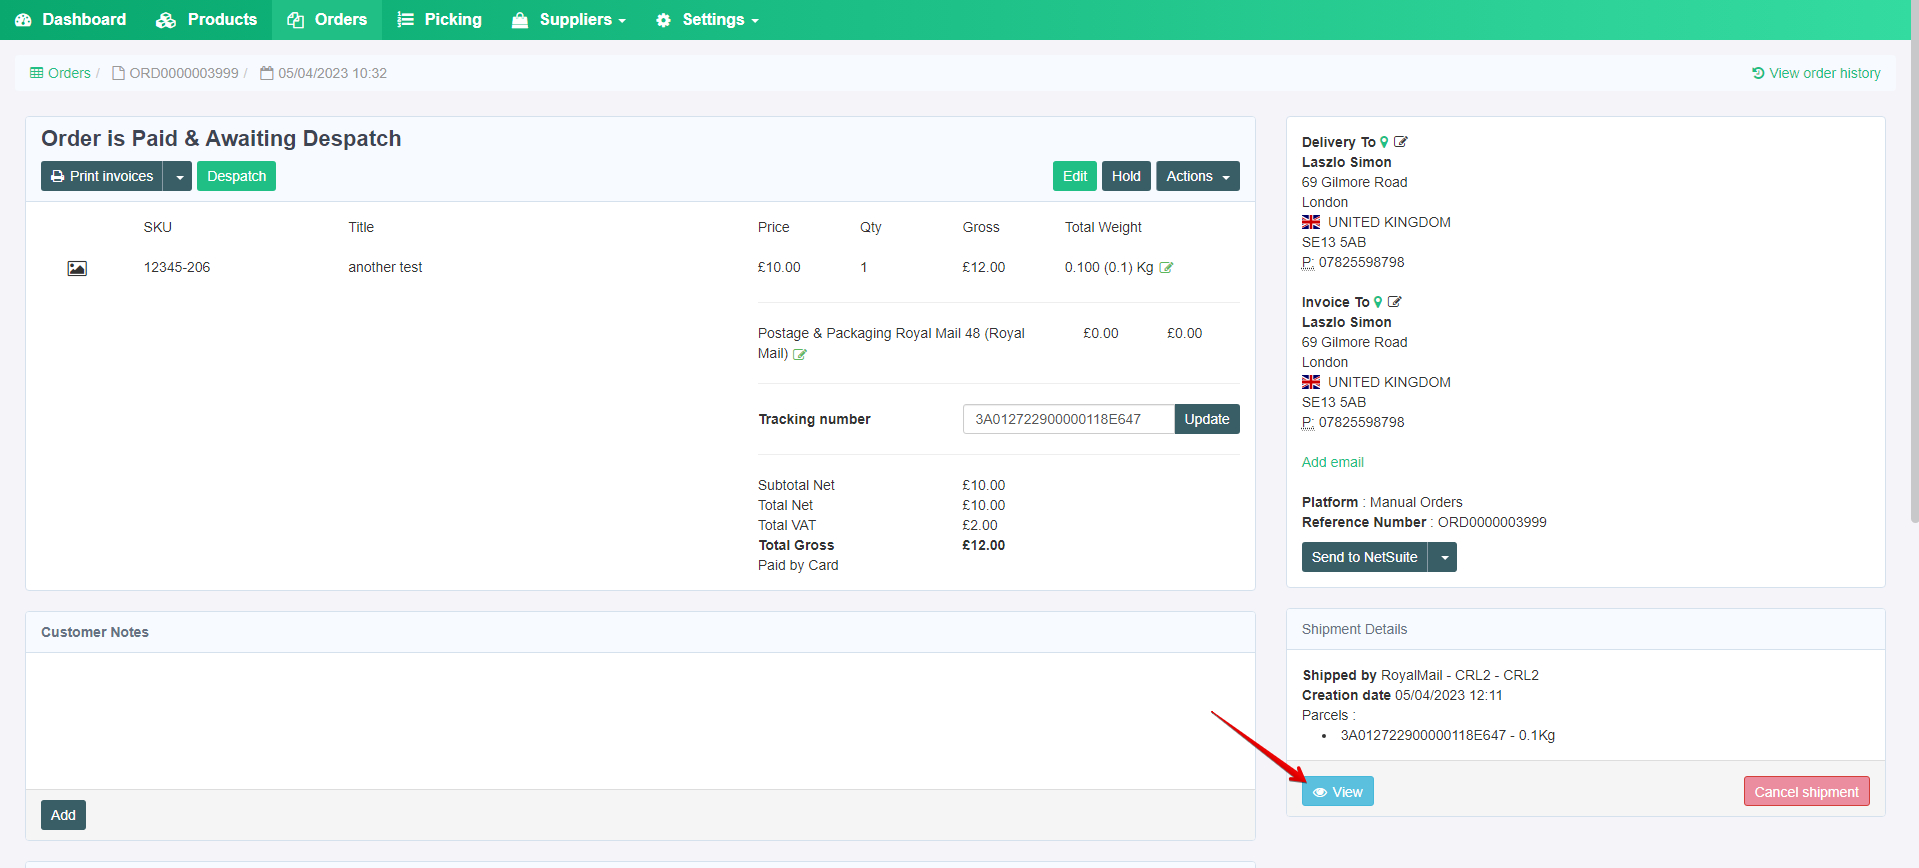
6. You can also go into the Order Details and view the created label, in case you end up closing the label PDF window by mistake:
These are the steps you’d have to take to Map a Carrier Integration and produce Carrier Labels.